What Is Emergency Roof Tarping In Wylie?
Introduction
When disaster strikes, your roof can be the first line of defense against the elements. Whether it’s a heavy storm, unexpected hail, or even fallen debris, a damaged roof can lead to serious issues if not addressed quickly. One of the most effective immediate solutions is emergency roof tarping. This guide will walk you through everything you need to know about emergency roof tarping—what it is, how to do it, and important considerations along the way.
What is Emergency Roof Tarping?
Emergency roof tarping refers to the process of applying a tarp over a damaged section of your roof to prevent further water intrusion and damage. It's a temporary solution that offers protection until more permanent repairs can be made.
Why You Need Emergency Roof Tarping
If you’ve ever wondered why roof tarping is essential, here’s an inside scoop:
- Prevents Water Damage: The primary goal of tarping is to stop water from entering your home.
- Protects Interior Spaces: Avoid costly repairs within your home by preventing leaks.
- Quick Response: It can be done rapidly; often in less than an hour.
When Should You Consider Roof Tarping?
If you've experienced any of the following situations, it might be time to look for “roof tarping near me”:
- Severe weather events like hurricanes or storms
- Sudden leaks or visible water damage inside your home
- Accidental damage from falling branches or debris
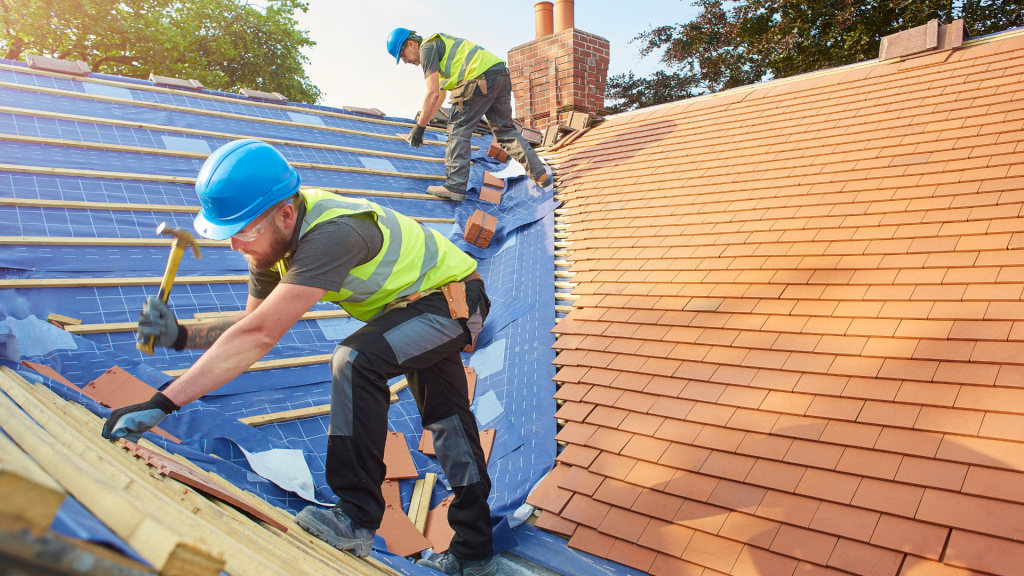
Gathering Your Materials for Emergency Roof Tarping
Before you start with emergency roofing services, make sure you have all necessary materials. Here’s what you'll need:
Essential Tools and Materials
Step-by-Step Guide to Emergency Roof Tarping
Now that you're equipped with everything you need, let's dive into how to effectively tarp your roof.
Step 1: Safety First
Before doing anything else, check the weather conditions outside. If it’s still stormy, wait until it calms down as safety should always come first.
Step 2: Get Up on Your Ladder
Carefully climb up your ladder and assess the damage from above. Make sure you're steady before proceeding.
Step 3: Prepare Your Tarp
Lay out your tarp on a flat area if possible and measure how much you'll need based on the surface area of the damage.
Step 4: Position the Tarp
Throw one end of the tarp over the damaged section of your roof while holding onto another edge securely.
Step 5: Secure It Down
Use rope or bungee cords to tie down each corner of the tarp firmly. If necessary, use nails or screws (without damaging existing structures) for extra stability.
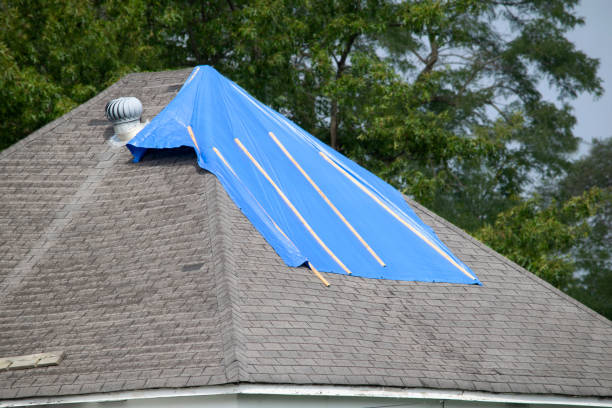
Step 6: Check Stability
Once secured, make sure there are no loose ends that could catch wind and pull off the tarp later.
Tips for Effective Emergency Roof Tarping
Here are some handy tips that may help in successfully executing emergency roof tarping:
Choose Quality Tarps
Opt for high-quality materials that can withstand harsh weather conditions.
Work in Pairs
Having someone assist you can make positioning and securing much easier and safer.
Don't Overextend Yourself
If you're not comfortable climbing ladders or working at heights, consider calling professionals who provide “24 hour emergency roof repair.”
Common Mistakes When Tarpaulin Roofing
Let’s face it; nobody's perfect! Here are some common blunders people make when they try DIY tarping:
FAQ Section
1. How long does emergency tarping last?
Tarping is meant as a temporary fix; typically lasting anywhere from a few days up to several weeks depending on environmental factors.
2. Can I do this myself?
Absolutely! Just ensure you're safe while doing so! If uncertain, professional services are available locally under "emergency roofing services."
3. What if my house gets damaged during bad weather?
Don’t panic! Call local professionals who specialize in “24-hour emergency roof damage claims roof repair near me.”
4. Will insurance cover these repairs?
Most homeowner's insurance policies cover sudden damages such as storm-related incidents but check with your provider for specifics.
5. Should I tarp over shingles?
Yes! Just ensure they're secure before placing a tarp over them.
6. How do I remove the tarp afterward?
Carefully take off all securing ropes and gently peel back from one corner while ensuring no additional damage occurs beneath.
Conclusion
In summary, knowing how to properly execute emergency roof tarping can save you both time and money while safeguarding your home from further damages after an unexpected event. Remember to prioritize safety throughout the process and don’t hesitate to seek professional help when necessary!
It’s always better to prepare than be caught off guard—especially when nature decides it’s time for chaos!
So next time you're faced with an urgent roofing issue, think about this beginner's guide—your go-to resource in tackling those unexpected leaks! Be proactive rather than reactive; after all, you never know when disaster might strike again!
This guide has provided insights into emergency roof tarping while incorporating valuable keywords like "roof tarping near me," "emergency roofing services," "24 hour emergency roof repair near me," and "24 hour emergency roof repair." So next time you're in trouble with leaky roofs or heavy storms—remember this guide!