
DIY Mold Remediation: Is It Safe and Effective?
Mold can be a homeowner's worst nightmare. It creeps in silently, often unnoticed until it becomes a significant problem. Not only does mold pose aesthetic issues, but it can also lead to health problems and structural damage if left untreated. Many people consider DIY mold remediation as a solution to combat this unwanted intruder. But is doing it yourself safe and effective? Let’s dive into the nitty-gritty of DIY mold remediation and find out.
Understanding Mold: The Foe Within Your Walls
What is Mold?
Mold is a type of fungus that thrives in damp environments. It reproduces by releasing spores into the air, which can lead to allergic reactions and respiratory issues when inhaled.
How Does Mold Grow?
Mold requires three primary conditions to flourish:
Common Types of Mold
- Aspergillus: Commonly found indoors; can cause respiratory issues.
- Cladosporium: Often appears as black spots on walls.
- Stachybotrys chartarum: Known as black mold; linked to severe health risks.
The Dangers of Mold Exposure
Health Risks Associated with Mold
Mold exposure can lead to various health problems:
- Allergic reactions (sneezing, runny nose)
- Asthma attacks
- Skin irritations
- More severe respiratory conditions
Who is at Risk?
While anyone can experience health issues due to mold, certain groups are more susceptible:
- Infants and children
- Elderly individuals
- Pregnant women
- People with pre-existing health conditions
DIY Mold Remediation: Is It Safe and Effective?
When faced with mold, many homeowners opt for DIY solutions. However, the effectiveness and safety of these methods often come into question.
Pros of DIY Mold Remediation
Cons of DIY Mold Remediation
Essential Tools and Materials for DIY Mold Remediation
Before starting your remediation journey, ensure you have the right tools on hand:
Protective Gear
- N95 respirator mask
- Gloves (preferably rubber or nitrile)
- Safety goggles
Cleaning Supplies
- Water
- Mild detergent or soap
- Vinegar or baking soda (natural alternatives)
- Bleach (for tougher stains)
Tools
- Scrub brushes
- Spray bottles
- Buckets
- Vacuum cleaner with HEPA filter
Step-by-Step Guide to DIY Mold Remediation
Now that you're armed with knowledge and supplies, let’s outline a comprehensive step-by-step approach:
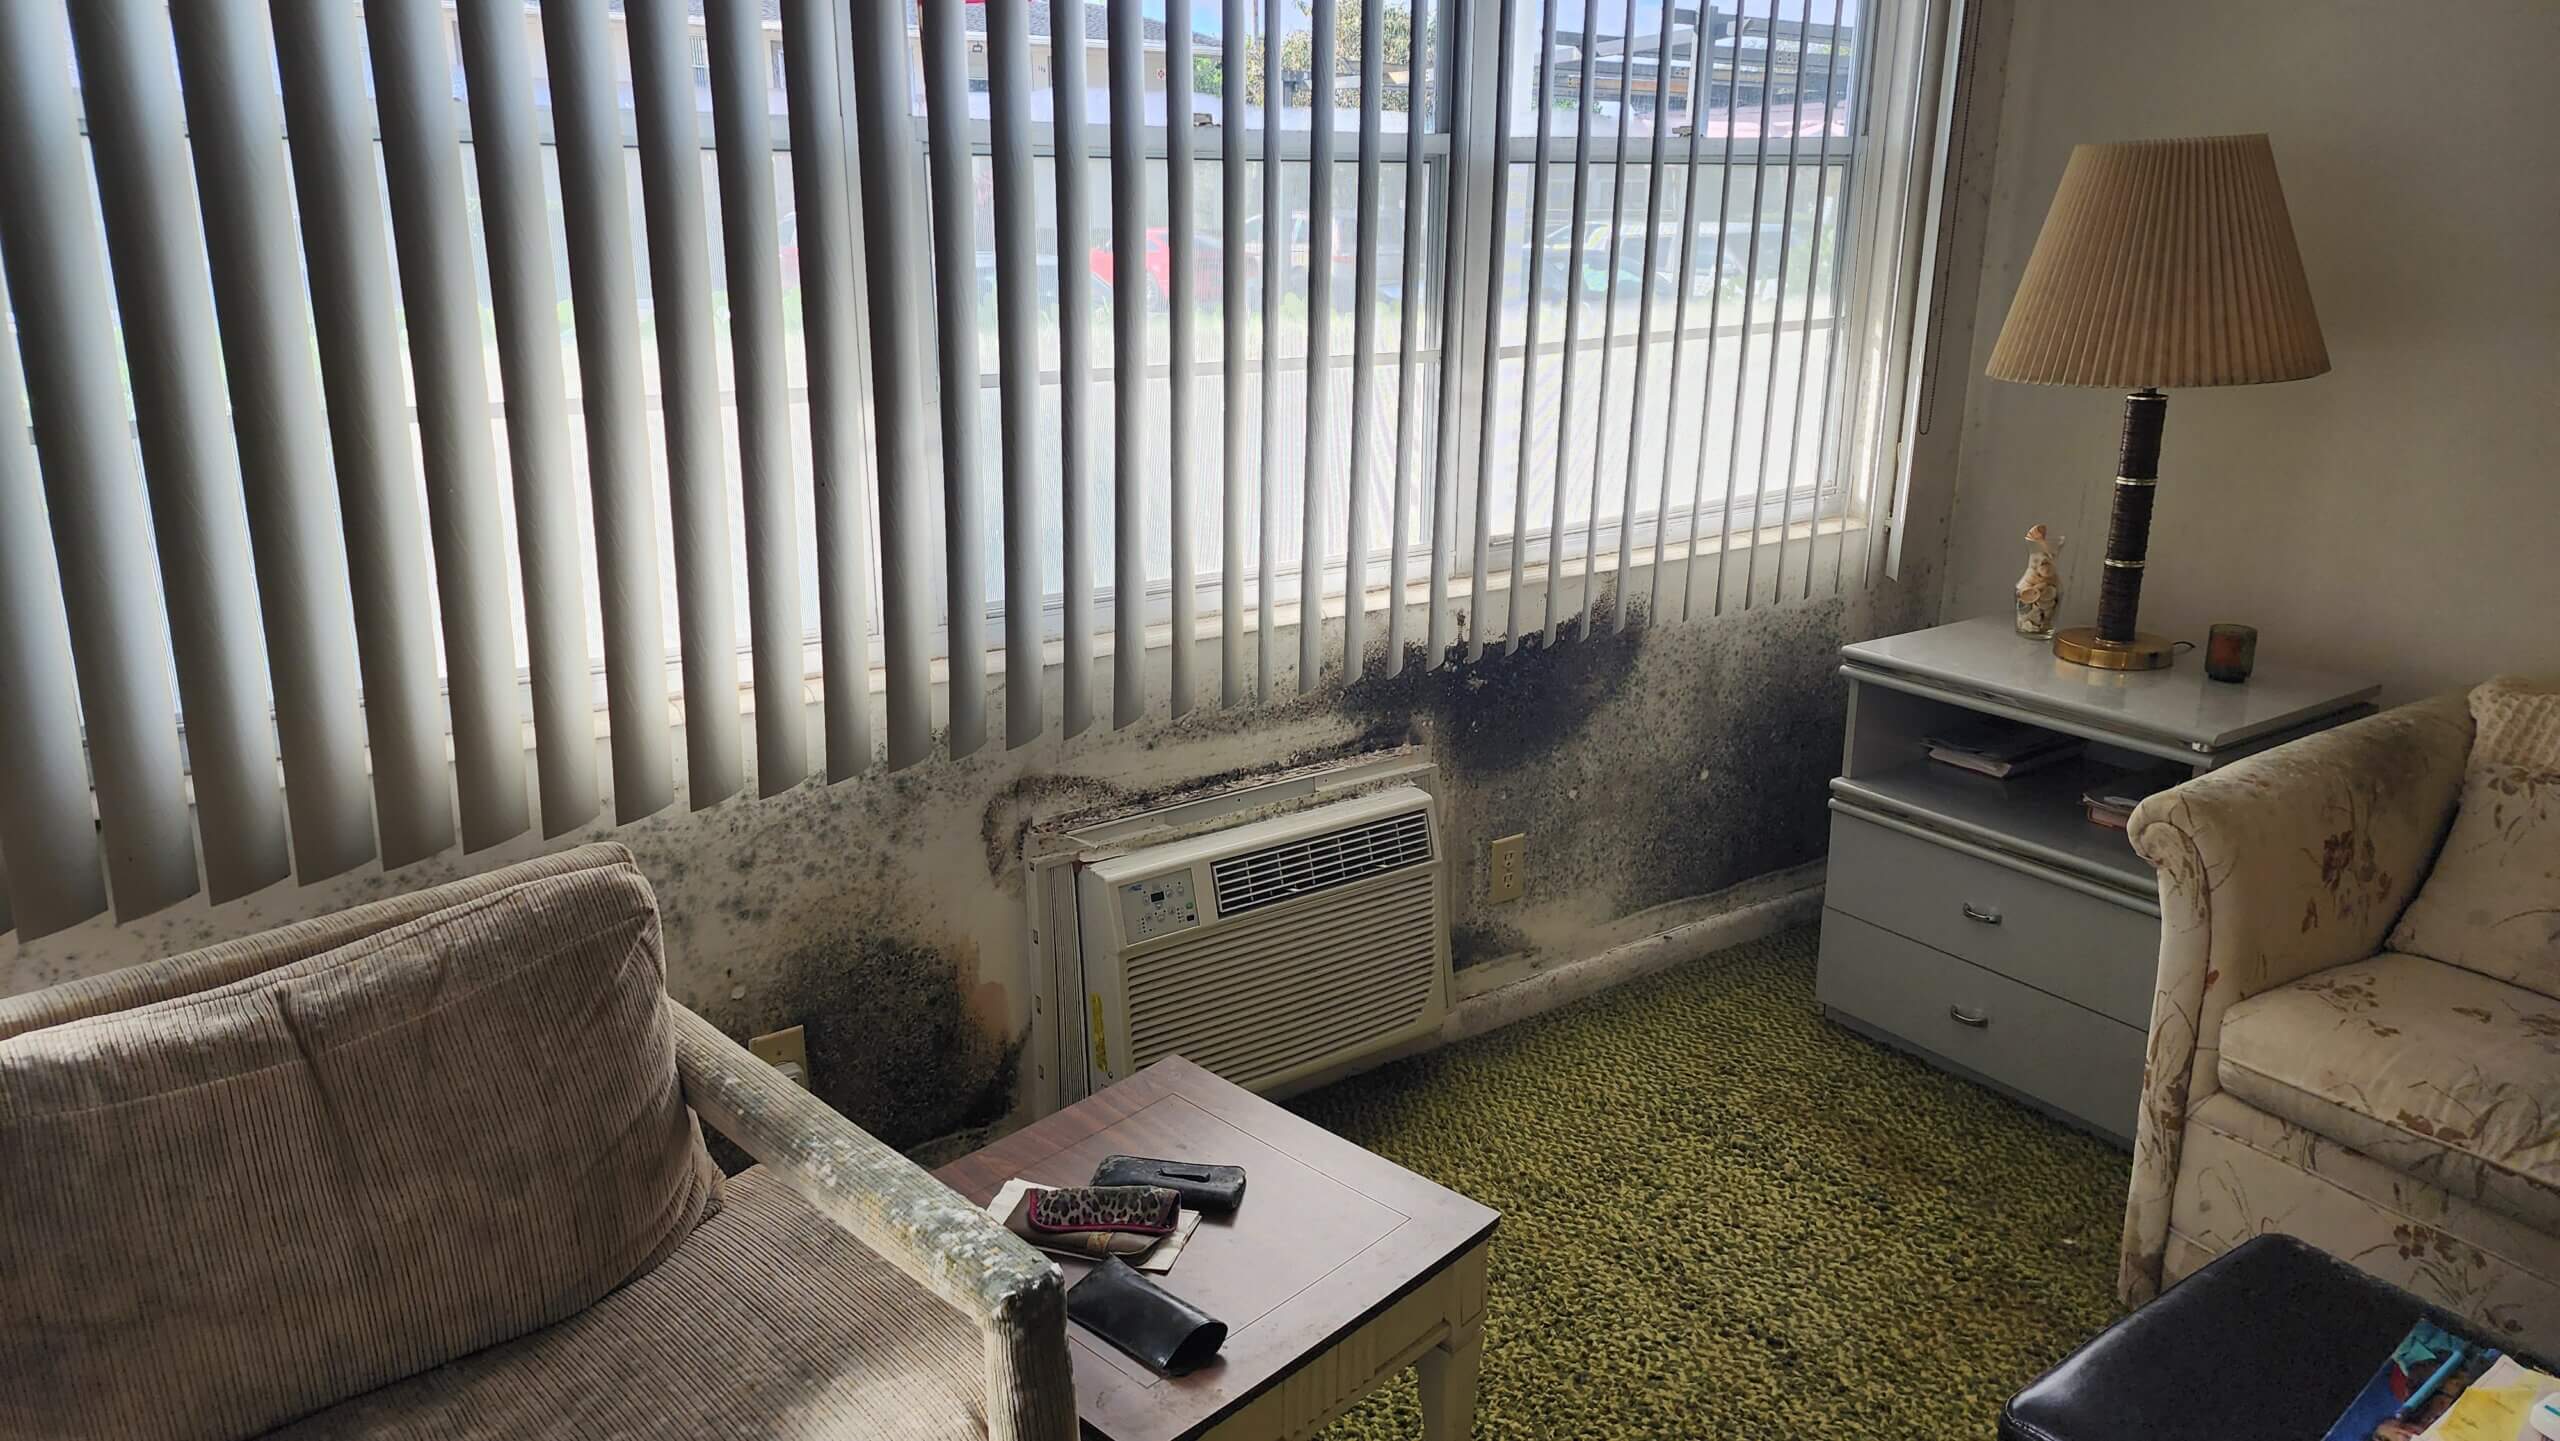
1. Identify the Problem Area
Check your home for visible signs of mold growth—walls, ceilings, bathrooms, basements—and identify areas with moisture.
2. Assess the Damage
Determine how extensive the mold problem is:
- Minor patches may require simple cleaning.
- Extensive infestations may need professional intervention.
3. Contain the Area
To prevent spores from spreading during cleanup:
- Seal off affected areas using plastic sheeting.
- Turn off HVAC systems.
4. Prepare Yourself
Put on protective gear before beginning cleanup efforts.
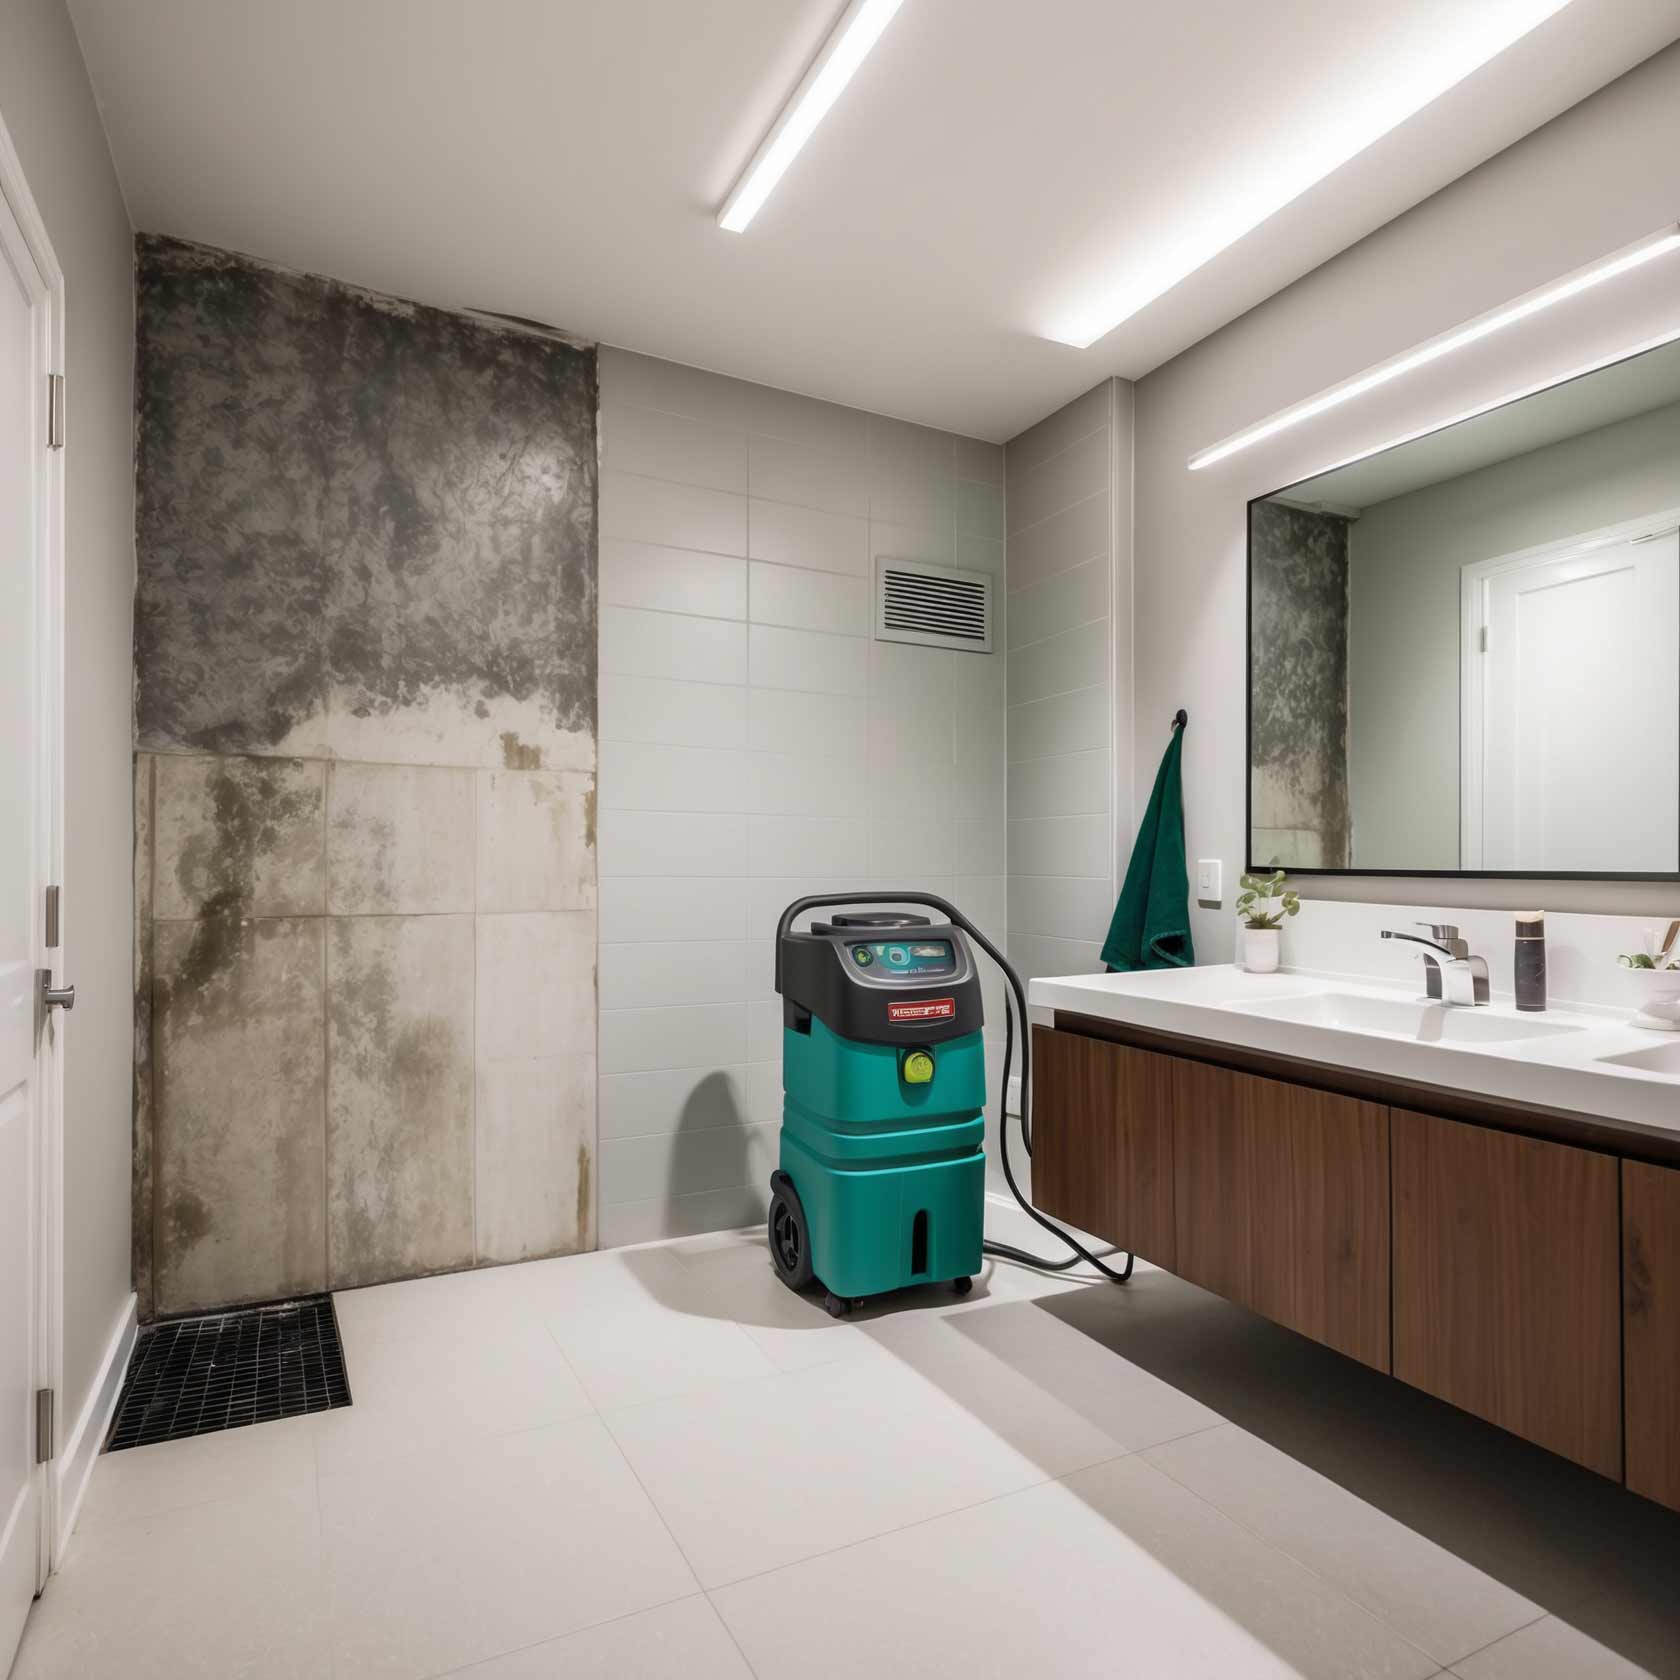
5. Remove Excess Moisture
Fix leaks or use https://tiptop-plumbing.com/pembroke-pines/mold-remediation dehumidifiers to lower humidity levels in affected areas.
6. Clean Surfaces
For non-porous materials (tiles, metal):
- Use a mix of water and detergent or vinegar.
- Scrub thoroughly before rinsing.
For porous materials (carpets, drywall):
- If heavily infested, it's best to discard them entirely.
7. Dry Out Affected Areas
Ensure all cleaned surfaces dry completely to prevent future growth.
Preventing Future Mold Growth
Once you've dealt with existing mold infestations through DIY methods or professional help:
Maintain Low Humidity Levels
Keep indoor humidity below 50% using dehumidifiers or air conditioning units.
Ventilate Areas Prone to Moisture
Utilize exhaust fans in kitchens and bathrooms while ensuring proper airflow throughout your home.
When Should You Call Professionals?
While many minor cases are manageable through DIY efforts, certain situations warrant professional help:
Frequently Asked Questions about DIY Mold Remediation
What are some common signs that I have a mold problem?
Signs include visible growth on surfaces, musty odors, water stains on walls or ceilings, and unexplained increases in allergy symptoms among household members.
How do I know if my cleaning method is effective?
After cleaning an area, monitor it closely for new growth over several weeks—if no new signs appear after thorough cleaning and drying techniques have been applied effectively.
Can I use bleach for all types of mold?
Bleach can be effective against certain molds on non-porous surfaces but won't penetrate porous materials like drywall where roots may remain intact; thus further treatments might still be necessary afterward!

What should I do if I’m sensitive to chemical cleaners?
Consider using natural alternatives like vinegar or baking soda solutions instead—they're less harsh than commercial products yet still provide decent efficacy against mild infestations!
Is it necessary to remove furniture during remediation?
While not always required depending on severity/location/size/extent/method being employed/removal needs assessment—it’s usually wise practice regardless just so those items won't become susceptible themselves either through transfer/contact/spreading spores elsewhere inadvertently!
Conclusion
In conclusion—while DIY methods for mold remediation offer some benefits like cost savings and control over processes involved—they come with potential risks too! It's crucial not only understand what steps entail but also recognize when professional assistance becomes necessary as well! Always prioritize safety first above all else—because nobody should ever compromise their health just trying regain control over their living space again!
With this comprehensive guide on "DIY Mold Remediation: Is It Safe and Effective?", you now have a robust understanding of how to address this issue safely while assessing whether tackling it yourself makes sense given circumstances at hand!